Install Docker
First of all, you will need to install Docker. Ensure you are using the stable channel, and at the time of writing this post, I used version 2.2.0.5 (43884) I also like to use PowerShell ISE; the PS command line will work as well.Select your Sandbox
Next, you need to decide what kind of sandbox you want in your docker. One way to speed up this decision is to simply clone what you already have in your production environment. Now assuming that you are running SaaS version of Business Central, simply search for ‘sandbox’ or ‘container’ and you will be presented with this: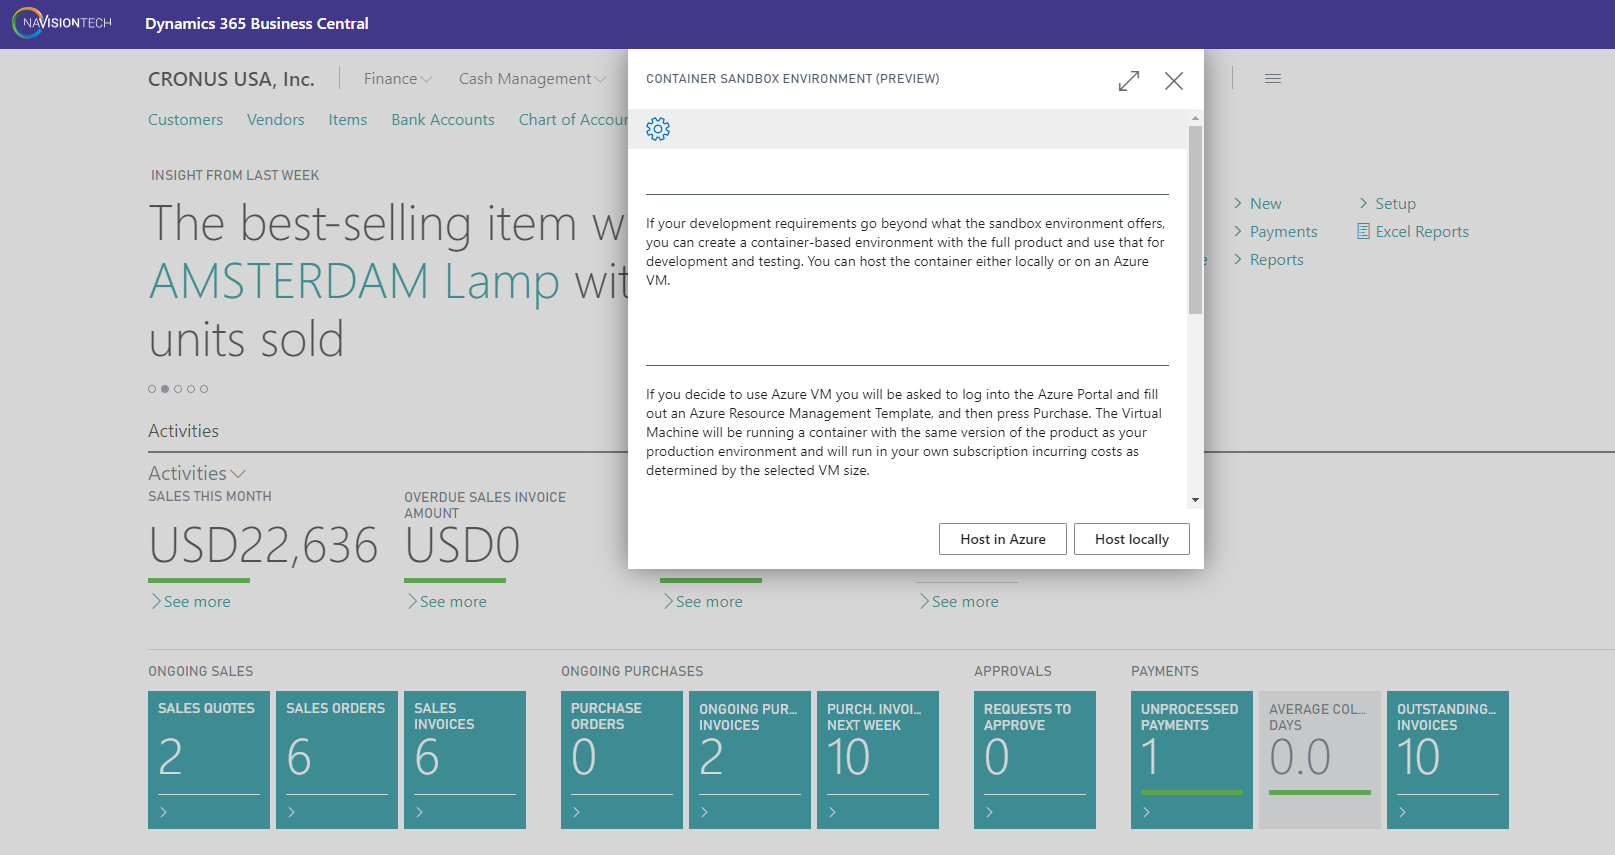 Choose ‘Host Locally’, and a CreateBCSandbox.ps1 file will be downloaded containing the script you need for your Docker. This file will look like this:
install-module navcontainerhelper -force # set accept_eula to $true to accept the eula found here: https://go.microsoft.com/fwlink/?linkid=861843 $accept_eula = $false $containername = ” $navdockerimage = ‘mcr.microsoft.com/businesscentral/sandbox:15.4.41023.41345-us’ $appbacpacuri = ” $tenantbacpacuri = ” $additionalParameters = @() if ($appbacpacuri -ne ” -and $tenantbacpacuri -ne ”) { $additionalParameters = @(“–env appbacpac=””$appbacpacuri”””,”–env tenantBacpac=””$tenantbacpacuri”””) } $credential = get-credential -UserName $env:USERNAME -Message “Using Windows Authentication. Please enter your Windows credentials.” New-NavContainer -accept_eula:$accept_eula ` -containername $containername ` -auth Windows ` -Credential $credential ` -includeCSide ` -alwaysPull ` -doNotExportObjectsToText ` -usessl:$false ` -updateHosts ` -assignPremiumPlan ` -shortcuts Desktop ` -imageName $navdockerimage ` -additionalParameters $additionalParameters Setup-NavContainerTestUsers -containerName $containername -password $credential.Password
You could try and run it as is, but chances are you will run into an issue or several. It makes sense to read the script and understand what it will do. So first of all on line 4, set the parameter to true. This simply tells that you have read and agreed to the EULA. Next, on line 6 name your container something like ‘BCSandbox’. Then pay attention to the image you are about to download. This image refers to the US build which is likely the mirror of your production. You may substitute it for any other published version. This page here will show you other options, there are many.
Additional Parameters
Next, you also may want to add some additional parameters such as ports to publish: “–publish 8180:8080”, “–publish 81:80”, ”–publish 7146-7149:7046-7049”,”–env publicFileSharePort=8080”,”–publish 444:443” The strange thing is that this auto-generated file also contains -IncludesCSide parameter, but I found that with the version I am trying to create this parameter is no longer supported, so I had to remove it, I suggest you do as well, especially if you are planning to develop in AL.Install the License file for Development
Finally, you will want to add a -licenseFile parameter with a path to your license. Now, this will be needed only if you plan to develop, especially if you want to deploy extensions within your own object range. Of course, you could add the license later on too, but you might as well get it out of the way now. The result should look something like this:install-module navcontainerhelper -force
# set accept_eula to $true to accept the eula found here: https://go.microsoft.com/fwlink/?linkid=861843
$accept_eula = $true
$containername = 'BCSandbox'
$navdockerimage = 'mcr.microsoft.com/businesscentral/sandbox:15.4.41023.41345-us'
$appbacpacuri = ''
$tenantbacpacuri = ''
$additionalParameters = @()
if ($appbacpacuri -ne '' -and $tenantbacpacuri -ne '') {
$additionalParameters = @("--env appbacpac=""$appbacpacuri""","--env tenantBacpac=""$tenantbacpacuri""",“–publish 8180:8080”, “–publish 81:80”,”–publish 7146-7149:7046-7049”,”–env publicFileSharePort=8080”,”–publish 444:443”)
}
$credential = get-credential -UserName $env:USERNAME -Message "Using Windows Authentication. Please enter your Windows credentials."
New-NavContainer -accept_eula:$accept_eula `
-containername $containername `
-auth Windows `
# -auth UserPassword `
-Credential $credential `
#-includeCSide `
-alwaysPull `
-doNotExportObjectsToText `
-usessl:$false `
-updateHosts `
-assignPremiumPlan `
-shortcuts Desktop `
-imageName $navdockerimage `
-additionalParameters $additionalParameters `
-licenseFile "E:\folder\license.flf"
Setup-NavContainerTestUsers -containerName $containername -password $credential.Password
Now execute the script, note that it will use your windows credentials that you are logged in with and I am not sure why I was prompted for a password twice. Be careful and type in the user name and password identically, and it should be the same as your current local user. I accidentally typed in the password incorrectly into one of those 2 prompts and it didn’t work for me. So I ended up wondering what could be wrong, so save your time. The process will run for a while, make sure you got plenty of space on your C drive. I know there are ways to point the image to another volume, but that’s probably material for another day and another blog.
Voila!
When it’s all done you will see the container in your docker You will also see 3 shortcuts on your desktop
- BCSandbox Command Prompt
- BCSandbox PowerShell Prompt
- BCSandbox Web Client
Tech Support from Navisiontech… On-Demand and On Point
Try Navisiontech Support today! We offer 2 FREE hours of support for nearly ALL versions of Dynamics NAV, from version 3 to Business Central. Our support team is US based and will provide support not only for your ERP system, but also for SQL Server, EDI, supply chain management tools, and even code-level support.


Hello, doesn’t work for us unfortunatelly.