

EasyEFT Help-center
Once you have downloaded the EasyEFT app to your Business Central instance, this guide will help you through the registration and setup process.
Assisted Setup
Assisted Setup is a module within Dynamics 365 Business Central where you will find assisted setup guides/wizards to help simplify the process of setting up complex features.
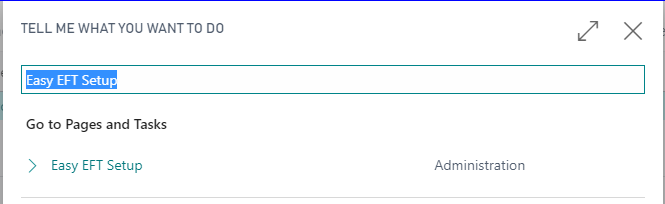
Use the magnifying glass at the top of BC to search for Assisted Setup. Select Assisted Setup from the selection list that appears.
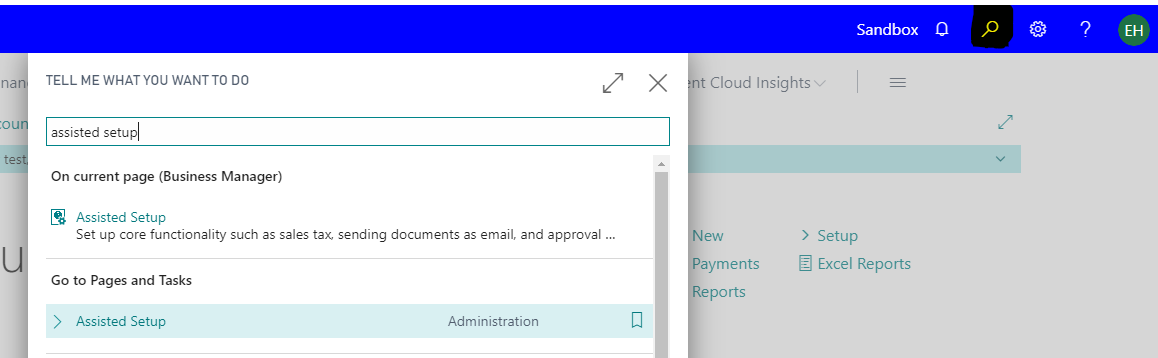
A list of Assisted Setup guides will appear for each section of BC.
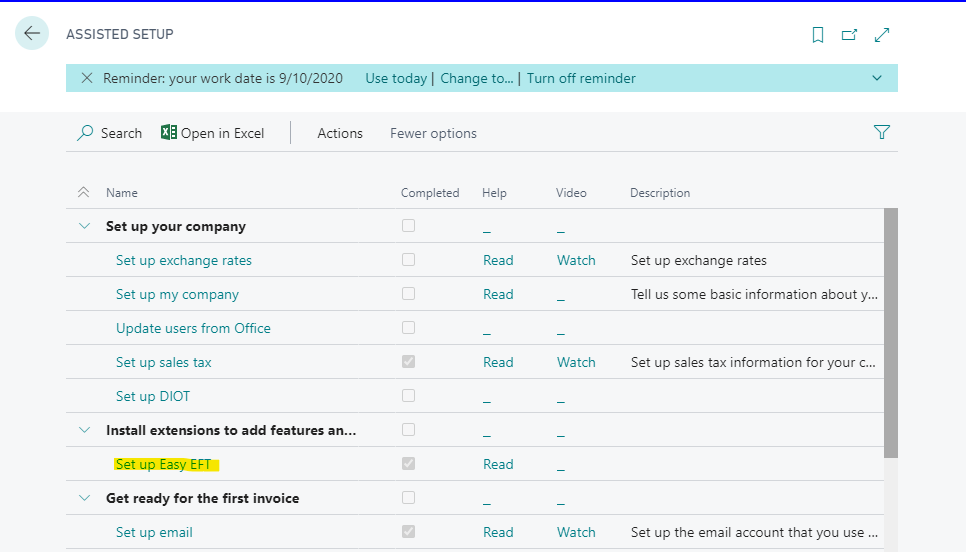
Under “Install extensions to add features and Integrations”, click on Set up Easy EFT.
If you have run this wizard once before, you will be asked if you would like to run it again.
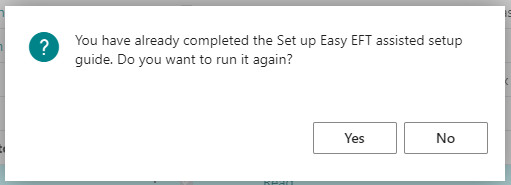
If you receive the above message, simply click Yes to continue.
The Easy EFT Setup Wizard will launch.
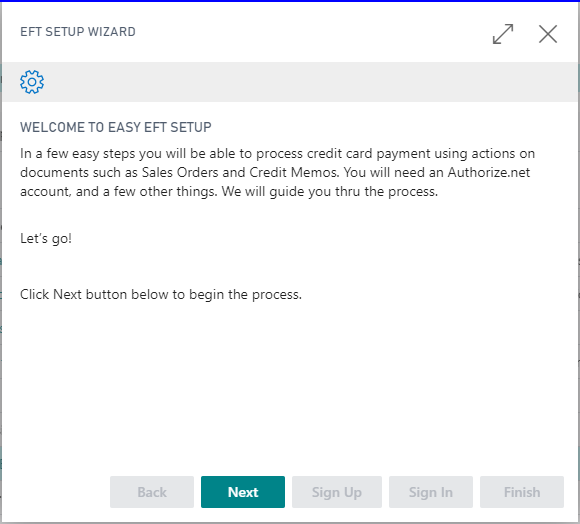
The first thing you will be asked is which subscription plan you would like to choose.
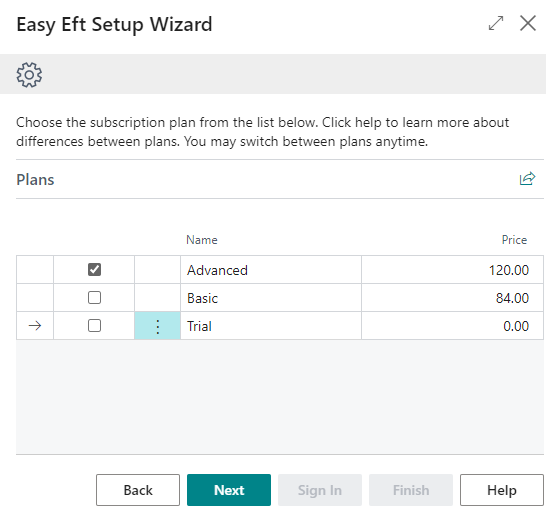
Trial Subscription
A 30-day trial subscription is available for you to take for a test spin in your sandbox environment.
A Merchant Account is not required to use the trial subscription. You may use an existing Authorize.Net Sandbox Account, or we will provide instructions on how to create a new one.
Basic Subscription
The Basic subscription is a monthly paid subscription with Navisiontech through Authorize.Net. The Basic Subscription allows you to use and store one (1) card-on-file per customer. If you are interested in the ability to send a payment link by, email you will want to consider selecting the Advanced Subscription.
A Merchant Account is required for activation. If you do not have a Merchant Account, this wizard will collect your contact information and a Navisiontech will help you setup up a Merchant Account.
Navisiontech will use the information submitted through this wizard to register a new Authorize.Net account for you to get started. You will receive an email from Authroize.Net with instructions to activate your new account.
Advanced Subscription
The Advanced Subscription is a monthly paid subscription with Navisiontech through Authroize.Net. The Advanced Subscription allows full use of Easy EFT features including the ability to send a link for payment by email as well as the ability to store an unlimited number of cards-on-file for each customer.
A Merchant Account is required for activation. If you do not have a Merchant Account, this wizard will collect your contact information and a Navisiontech will contact you to help you setup up a Merchant Account.
Navisiontech will use the information submitted through this wizard to register a new Authorize.Net account for you to get started. You will receive an email from Authroize.Net with instructions to activate your new account.
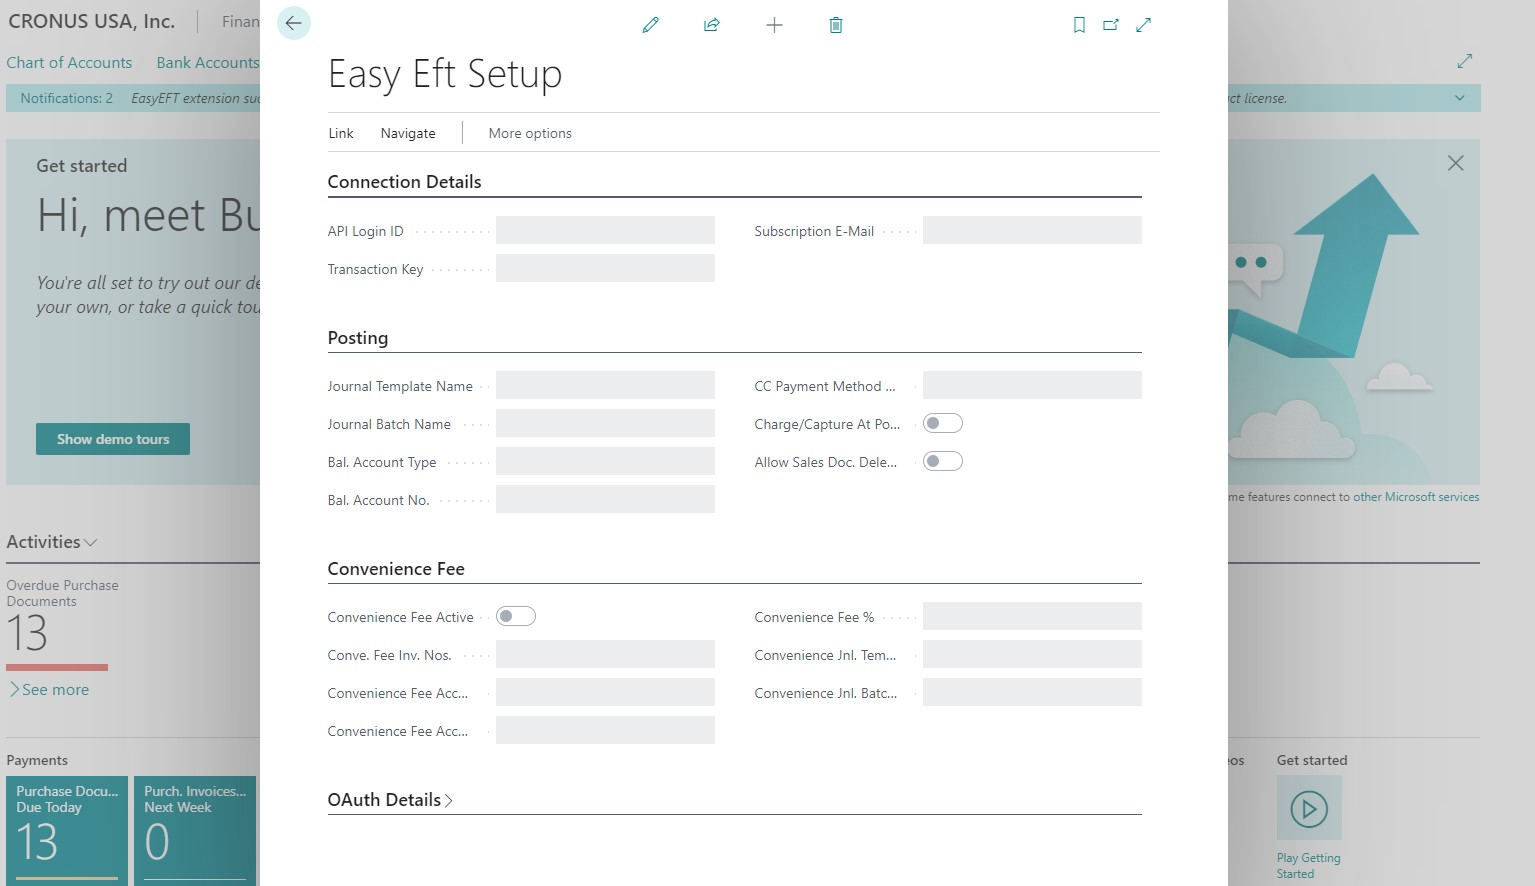
EasyEFT Setup Guide
The EasyEFT Setup guide will help you finalize your setup for Easy EFT. Here you will need to set up the following:
-
Connection Details
-
Posting Setup
-
Web Service Info (for Advanced Subscription only)
Once you have your Profile ID and Transaction key, go back to Dynamics 365 Business Central and navigate to Easy EFT Setup.
We will enter this information into the Connection Details.
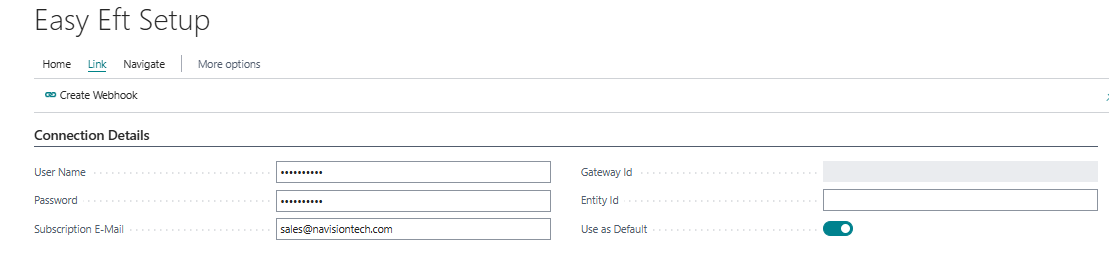
Enter your Username (API Login ID) and Password (Transaction Key) in the appropriate fields.
The Solution ID will be auto populated.
HTTP Post Request API
For the Trial Subscription, use https://apitest.authorize.net/xml/v1/request.api
For a paid subscription, use https://api.authorize.net/xml/v1/request.api
Posting Setup
Create and select the following suggested posting setups or consult with your accounting team for the best setup for your organization.

Web Services Setup
Web Services will enable you to send an email to customers with a link for payment. You must have SMTP setup on your BC environment to be able to send payment links to customers.
See How to Setup a Webservice
How to Find Your Web Service Credentials

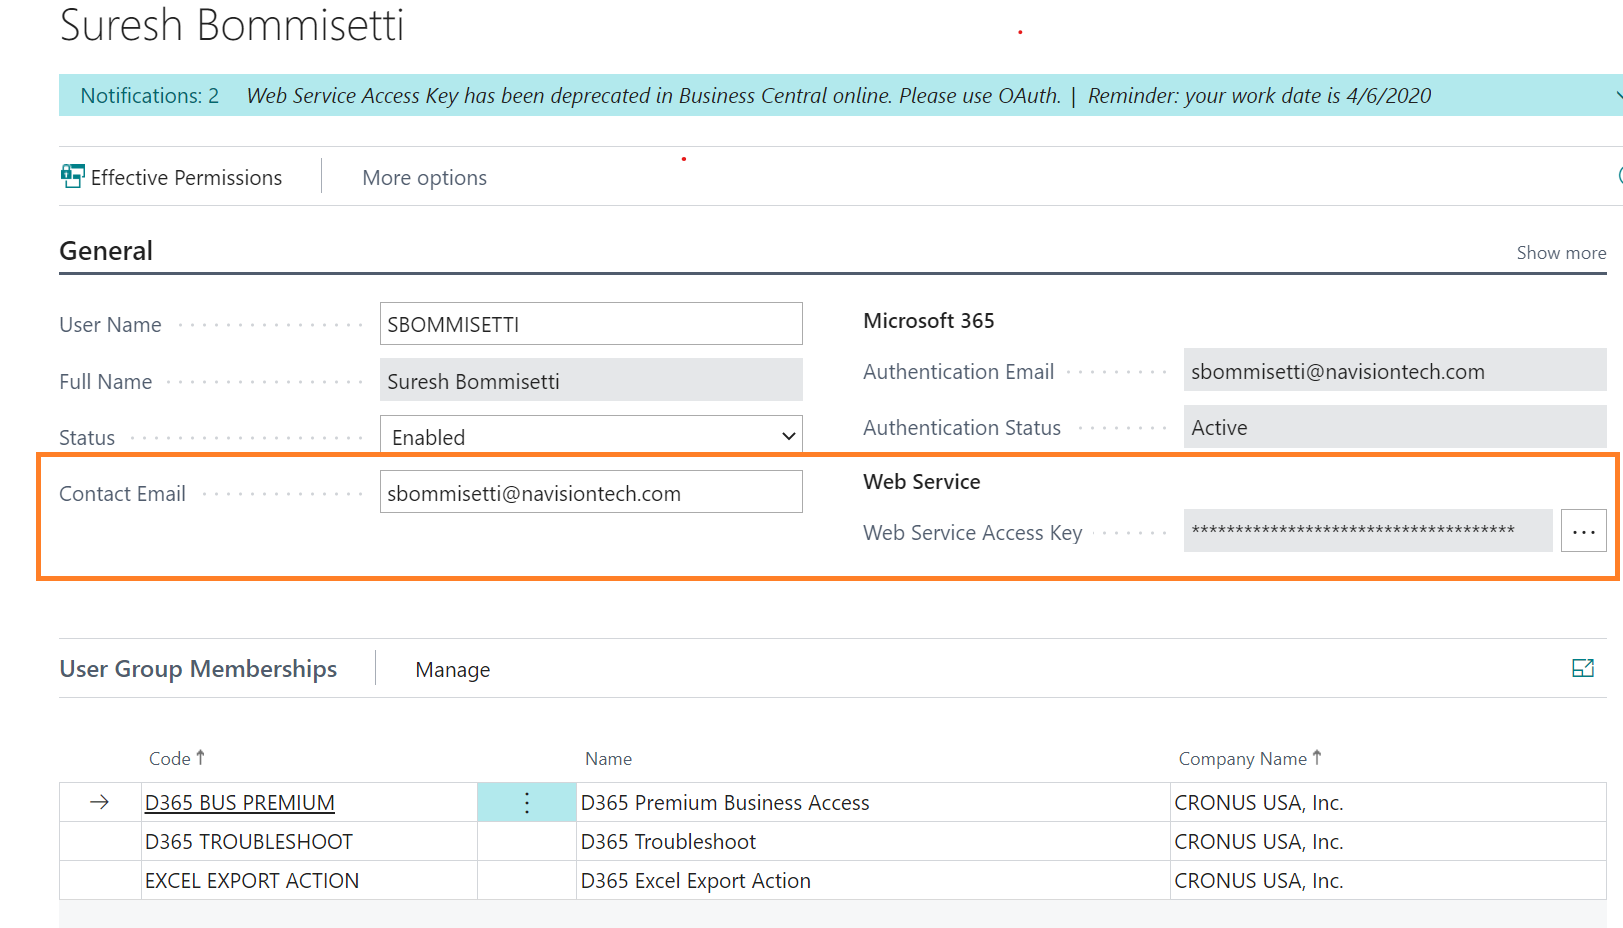
To find the information needed to complete the Web Service Setup, navigate to Users.
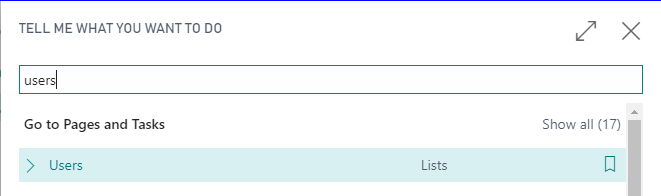
Open the card for the user assigned as the administrator of web services.
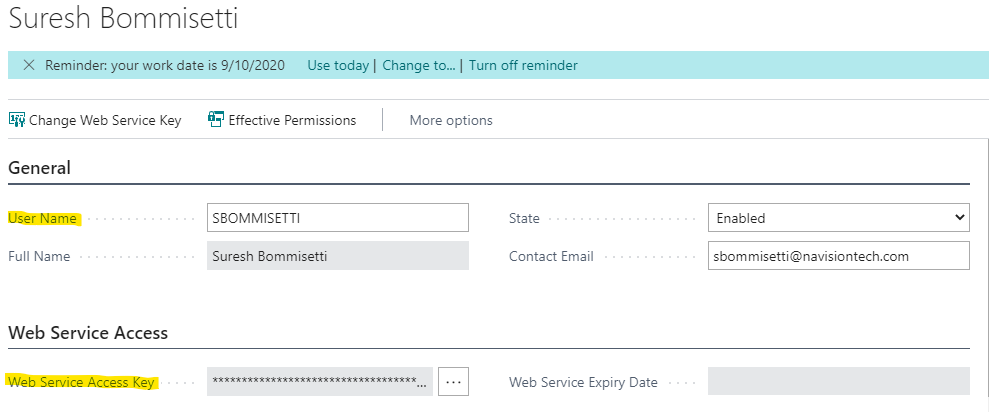
You will enter the User Name from the Users card as the Web Service User Name on the Easy EFT Setup page.
How to Upgrade to the Advanced Subscription
If you find that you have out-grown the Basic Subscription by needing to store multiple cards-on-file for your customers or would like to make use of the Payment Link by email feature, simply run the Assisted setup once again selecting the Advanced Subscription in the Wizard.
Search web service in Business Central
 Click on a new button and create web services as highlighted and make sure it is published.

Click on a new button and create web services as highlighted and make sure it is published.
Search user in Business Central
 Select any user:
 Search Easy EFT setup and make sure Web Service Info details are filled:
Select any user:
Search Easy EFT setup and make sure Web Service Info details are filled:
Web service key
Overview of Convenience Fee
Brief
Convenience Fee is a new feature in EasyEFT introduced in version 21.0.0.4; its purpose is to pass the expense of credit card processing costs to customers. As a Business Central administrator, you can define the fee in percentage value, and this fee will be added to the payment.
Convenience Fee is triggered only when a payment is made, in other words it is calculated upon payment. It is not calculated up front during Sales Order creation for example.
Examples:
Convenience Fee amount is always in addition to the total invoiced value. Let’s discuss one of the examples:
Example 1: Sales Order is invoiced, and its total invoiced value is $100.00, if Convenience Fee is setup at 3%, total payment is captured for $103.00. This marks the invoice as overpaid. When Cash Receipt Journal is processed by running ‘Suggest CC Payments’ batch job, Convenience Fee invoice is created automatically and both original and fee invoice are applied to $103.00 payment.
Example 2: Already invoiced sales documents are suggested into Cash Receipt Journal using ‘Suggest Payments Due’ batch job. Amounts of these invoices reflect original invoiced amounts, but when payment is captured, each invoice is overpaid, and Convenience Fee invoice is created automatically and both original and fee invoices are applied to corresponding payments.
Setup:
You need to turn on Convenience Fee in EasyEFT Setup and create a new number of series for invoices related to this fee. Convenience fee will be charged on a separate accounts receivable invoice.
Convenience Fee Account Type should be selected. Please note that currently only G/L Account is supported.
Select appropriate income G/L Account
Enter Convenience Fee %
Convenience Jnl. Template Name should be selected; typical choice is GENERAL because General Journal will be used to post these entries.
Convenience Jnl. Batch Name – it is recommended that new batch is created, for example CFEE with Description ‘Convenience Fees’
Convenience Fee is added to any payment that is considered credit card payment. EasyEFT specifies credit card payment method on EasyEFT Setup page.
What versions of Dynamics does EasyEFT support?
EasyEFT supports Dynamics NAV versions 2009 to 2018 and all deployment models of Dynamics 365 Business Central (on-premises, SaaS, and hybrid)
How does EasyEFT ensure transaction security?
Easy EFT is in full compliance with Payment Card Industry (PCI) and uses Authorize.Net, a trusted payment gateway owned by Visa, to handle transactions securely.
How do I get started with EasyEFT?
You can start with a 30-day free trial. Navisiontech provides technical support for setting up the trial in a sandbox environment. After the trial, you can choose between the Basic and Advanced subscription plans.
What are the subscription plans for EasyEFT?
There are two subscription plans:
-
Basic: $84 per user per month, including storage for one credit card per customer and unlimited transactions.
-
Advanced: $120 per user per month, including unlimited card storage per customer and additional features like emailing secure payment link.
Is there a free trial available for EasyEFT?
Yes, there is a 30-day free trial available which can be installed in your Business Central sandbox environment.
In which countries are EasyEFT available?
Easy EFT is available in the United States, Canada, Australia, and the United Kingdom.
Where can I find EasyEFT to download?
Yes, Easy EFT can be found on Microsoft AppSource, ensuring it is a trusted and certified solution for Microsoft Dynamics software. This provides users with the confidence that they are integrating a reliable and high-quality application into their business operations.
Can EasyEFT handle high volumes of transactions?
Yes, EasyEFT is optimized for handling high volumes of Card-Not-Present (CNP) transactions efficiently, making it ideal for businesses with significant transaction needs such as online retailers, and any other enterprises that require robust and reliable payment processing capabilities.
What support does Navisiontech offer for EasyEFT?
Navisiontech provides extensive technical support for EasyEFT setup and ongoing use. This includes assistance with Authorize.Net integration and merchant account setup.
How long does it take to implement EasyEFT?
The implementation time for EasyEFT varies, but with Navisiontech’s support, it can be set up and ready to use quickly.
Is there a setup fee for Easy EFT?
There is a fixed fee we charge to the customer that is $2,000. which includes training, installation and configuration. In total 8 hours.
Can I switch between subscription plans?
Yes, you can switch between the Basic and Advanced subscription plans based on your business needs.
What types of businesses can benefit from Easy EFT?
Easy EFT can benefit a wide range of businesses that need efficient, secure, and cost-effective electronic funds transfer solutions. These include wholesale distribution businesses, e-commerce companies, subscription-based services, utility providers, and any organization that uses Dynamics 365 Business Central. Easy EFT helps businesses to reduce transaction fees, improve cash flow and enhance customer satisfaction.
Can I charge a customer anytime using Easy EFT?
Yes, Easy EFT can let you charge customers at any point by securely storing customer credit card information.
How many total credit cards do we save with Easy EFT?
Multiple cards can be saved securely with Easy EFT.
Can we use gift cards along with Easy EFT?
Yes, gift cards can be used. But this will be customized and updated for EasyEFT.
Can we integrate any third-party applications with Easy EFT?
Yes, third party applications can be integrated such as LS POS, Tinx or any other woo commerce plugins.
What is Easy EFT?
Easy EFT is an advanced credit card processing solution by Navisiontech Inc., designed for seamless integration with Microsoft Dynamics 365 Business Central and Dynamics NAV. It leverages Authorize.Net, a leading payment gateway, to ensure secure, efficient, and PCI-compliant transactions.
How to Create an Authorize.Net Sandbox Account?
The Authorize.Net Sandbox is necessary to test the Easy EFT Payment processing application. This sandbox environment will only simulate connections to the card networks. No actual card processing will be performed.
STEPS:
-
Go to the link: https://developer.authorize.net/hello_world/sandbox.html
-
Input all the information asked.
-
First Name*
-
Last Name*
-
Country/Region*
-
Email*
-
Developer Type*
-
Job Level*
-
Sandbox Company Name*
-
Sandbox Currency*
-
Login ID*
-
Password*
-
Accept the terms and agreement.
-
Click on create Account. A new account will be created.
Click here to create a free Authorize.Net Sandbox account.
Click here to log into your existing Authorize.Net Sandbox account.
How to get API Credentials and New Transaction Key?
Below are the steps:
-
Sign in to ‘Sandbox’ using the same Login ID and Password.
-
Input username and password.
-
Once login, it will ask to verify the identity. Click on ‘Request Pin.’ This pin will be sent to the same email ID which was entered while creating an account.
-
Input Pin and Password and click on ‘Verify Pin.’
-
Once successfully logged in, the screen below will be visible. The account will be on ‘Live’ – Green color.
-
Change the ‘Live’ or ‘Test’ mode as per the requirement. For getting API and Transaction key for sandbox, change it to ‘Test’ mode.
-
Click to ‘Account’ in top ribbon.
-
Go to ‘Security Settings.’ Click on ‘API Credentials & Keys.’
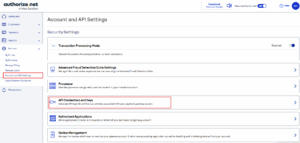
9. Get the API Login ID:
10. For ‘Transaction Key,’ Click on radio button – ‘New Transaction Key.’ NOTE: It is recommended to disable old transaction keys.
11. Verify identity by requesting pin.
12. Once correct pin is input, and account is verified.
13. After continuing, you will get transaction key.
These API credentials and transaction keys will be useful for setting up in EasyEFT in sandbox environment.
How to Upgrade EasyEFT to version 20.0.0.4 or later
If you are on this page, you probably want to upgrade EasyEFT to version 20.0.0.4 or later. This version includes critical update that allows Business Central and EasyEFT to communicate using oAuth protocol instead of basic authentication, which was recently deprecated by Microsoft.
As a result, Payment Link functionality will not work until your EasyEFT extension is upgraded to the latest version. Any existing Payment Links will not be operational, and after upgrade is completed, you will need to send out new payment links for those customers who haven’t used their links yet.
Upgrading of the extension requires completion of following steps. Please keep in mind that this only affects EasyEFT Advanced subscriptions, if you are using Basic subscription, please disregard this notification. If you are unable to complete these steps, please submit a ticket on our support portal. If you do not have access to support portal, please call our office at 941-914-914-9144-9144.
-
Upgrade your EasyEFT extension to latest version 20.0.0.4 if you do not know how to upgrade your extensions, you may follow easy instructions here.
Please note:
-
This new version will only be available to you if you have already upgraded your Business Central to version 20.0 or later. If you are on an earlier version, we encourage you to upgrade your Business Central instance as soon as possible. More on how to upgrade your Business Central instance can be found here.
-
This version of EasyEFT introduces new permission sets. You must assign new permissions to all users after this upgrade. Old permission set EASYEFT will not be valid anymore, instead EASYEFT – PROCESS will be
-
You will need to register an Application in your Azure AD. This is required because EasyEFT needs to securely authenticate Business Central. While registering this app, please save Tenant ID, Client ID and Secret Key as you will need them in step 4. More on registering an application in Azure AD can be found here. See “How to Register AzureAD Application for EasyEFT’ section.
-
You will also need to register the Application in Business Central, and assign permissions to it, so that both Azure AD Application and Business Central are connected.
-
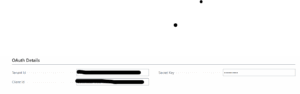
Update settings on EasyEFT Setup page on oAuth FastTab. Fields that need to be updated: Tenant ID, Client ID and Secret Key.

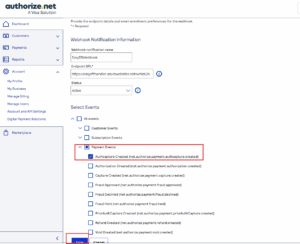
5. After step 4 is completed, please click on ‘Get Webhook Link’ action on EasyEFT Setup page and copy the generated URL into clipboard.
6. Login to your Authorize.net account and go to Accounts, under Business Settings, Notification Settings, Webhooks.
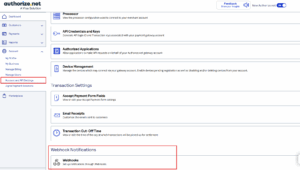
click on edit option (Note that due to the fact that the webhook url is rather long, you may need to scroll to the right to find the ‘Edit’ icon.) for existing endpoint and replace the URL with what you copied in previous step. Press Save.
Completing these steps will ensure that your environment and processing payments are secure.
How to Register AzureAD Application for EasyEFT. Using OAuth to Authorize Business Central Web Services (OData and SOAP)
To accomplish this, we must Register an application for BC in Azure AD Tenant as follows.
-
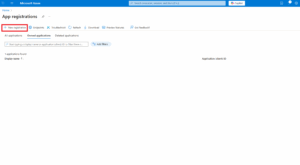
Sign in to Azure portal and open the Active Directory tenant.
-
Registering the application
3. Provide name for application and Redirect URL

4. Define the redirect URI on the bottom of the page.
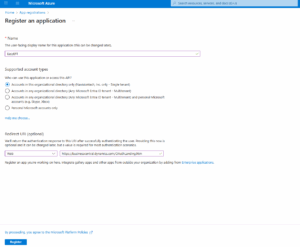
This Url can be either
-
https://businesscentral.dynamics.com/OAuthLanding.htm
-
https://lscentral.bc.dynamics.com/OAuthLanding.htm
Depending on your Application Family. You will be able to see this in the browser when you are using Business central. Just add the OAuthLanding.htm to the end of the URI
-
After you registered the application, set the Application ID URI for the application:
-
-
From the Overview page for your app registration, next to the Application ID URI label, select Add an Application ID URI.
-
-
-
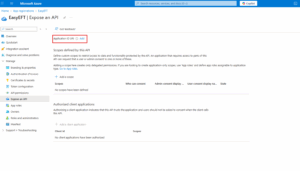
On the Expose API page, next to the Application ID URI, select Set.
-
-
The Application ID URI box displays the default application ID URI. It has the format api://, such as “api://70b20a51-46b7-4290-8686-b79ec90379f6”. You can keep this value or change it. The application ID URI must be a valid URI starting with HTTPS, API, URN, MS-APPX. It must not end in a slash. To use an HTTPS URI, for example https://cronusinternationltd.onmicrosoft.com/businesscentral, it must be a verified domain. Select Save when done.
-
-
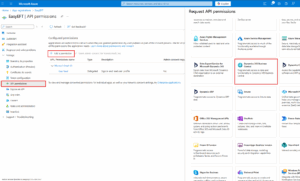
7. Go to API Permissions and select add a permission. From the window select Dynamics 366 Business Central.
-
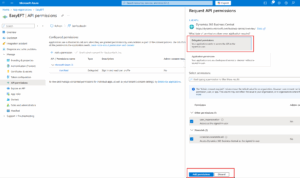
Then select the options highlighted below for the permissions to allow.

-
Next you will Grant admin consent to the permission you just selected.
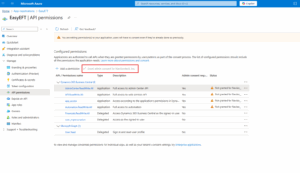
You will click confirm in the popup window. Then you will see the lines updated to a status of granted.
-
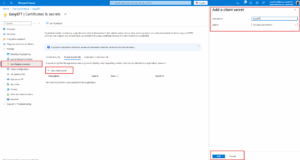
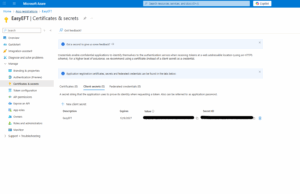
Next click on Certificates & secrets. Click on “New Client secret”. You will see a prompt for Description and Expiration. You can enter EasyEFT into description and select desired expiration. Remember that when secret value expires you will need to renew it and adjust settings in your EasyEFT setup.
Stay Connected