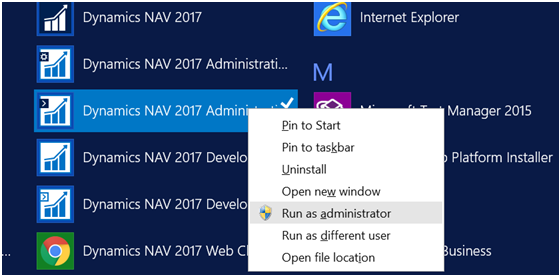
- 1. Run the Dynamics NAV 2017 Administration shell as administration.
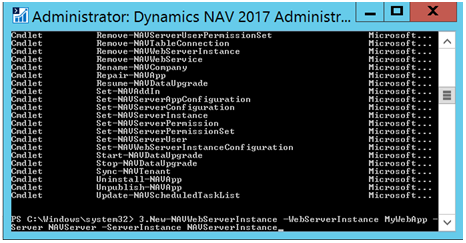
- 2. Run the following command.
- 3. New-NAVWebServerInstance -WebServerInstanceMyWebApp -ServerNAVServer -ServerInstanceNAVServerInstance
-
-
- 4. Change MyWebApp to the name that you want to give the virtual directory for the web server instance. This name will become part of the URL for the Microsoft Dynamics NAV Web client application, for example, https://MyWebServer:8080/MyWebApp/WebClient
-
-
-
- 5. Change NAVServer to the name of the computer that is running the Microsoft Dynamics NAV Server to which you want to connect.
-
-
-
- 6. Change NAVServerInstance to the name of the instance on the Microsoft Dynamics NAV Server.
-
-
-
- 7. This command only sets the required parameters of the NAVWebServerInstance cmdlet. The cmd let has several other parameters that can use to configure the web server instance. For more information about the syntax and parameters, see New-NAVWebServerInstance.
-
-
-
- 8. Press Enter to run the cmd let.
-
-
-
- 9. A new web server instance is added.
-
-
-
- 10. You can find the instance in the following folder C:\inetpub\wwwroot\MyWebApp
-
-
-
- 11. Before proceeding further, check the Web.Config file under C:\inetpub\wwwroot\MyWebApp . Open the file in notepad and check the parameters of the instance and the port as well as the credential type .
-
-
-
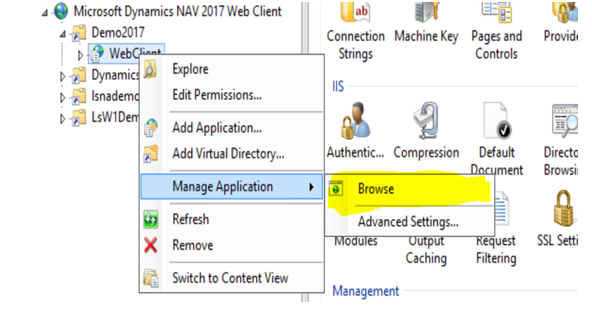
- 12. Once all set , then open the IIS and can run the web client as shown below.
-
- 13. Make sure to give the credential type as NavUserPassword .

-
- Navisiontech Inc.7244 Kyle Court Sarasota Fl. 34240


Leave A Comment