-
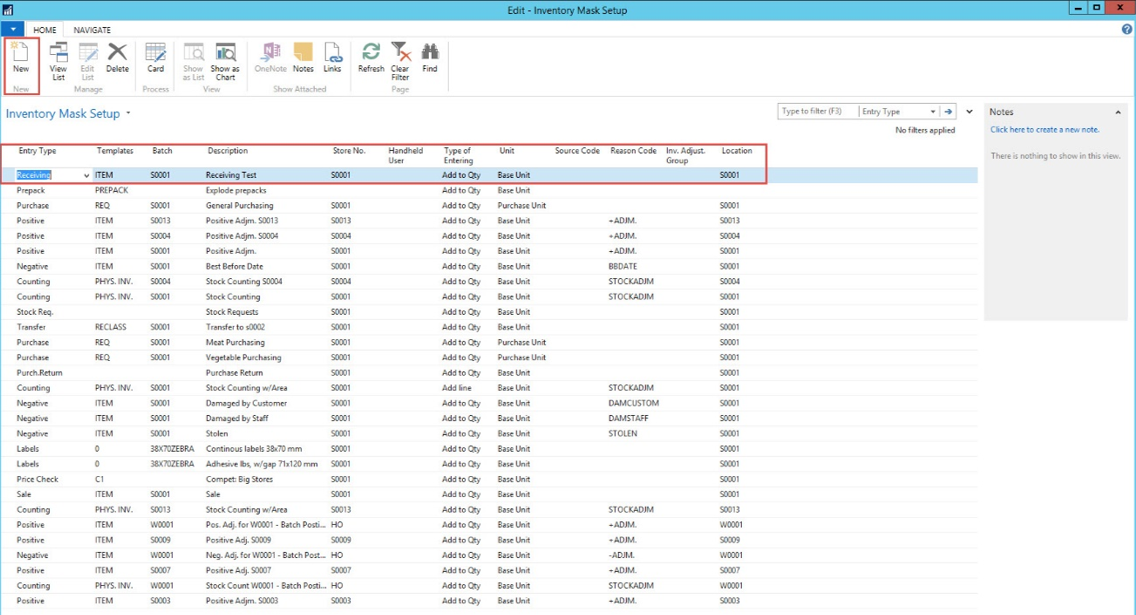
Create Inventory Masks and Worksheets in NAV
-
-
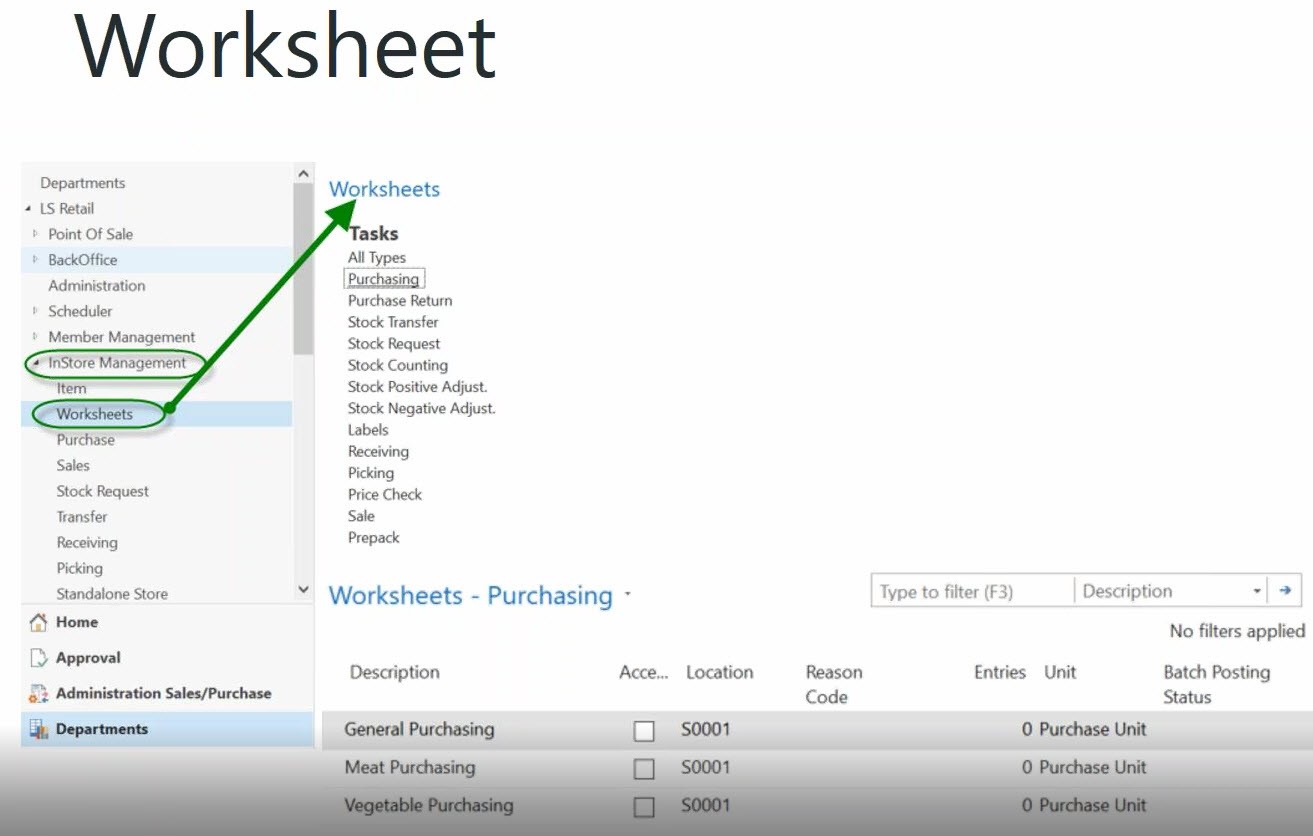
Under InStore Management you will be able to see the Worksheets that derive from the Inventory Mask created.
-
-
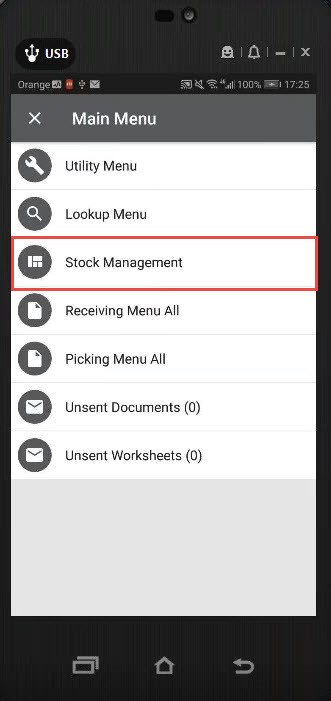
Go to the App in your device and find Stock Management in the Main Menu.
-
-
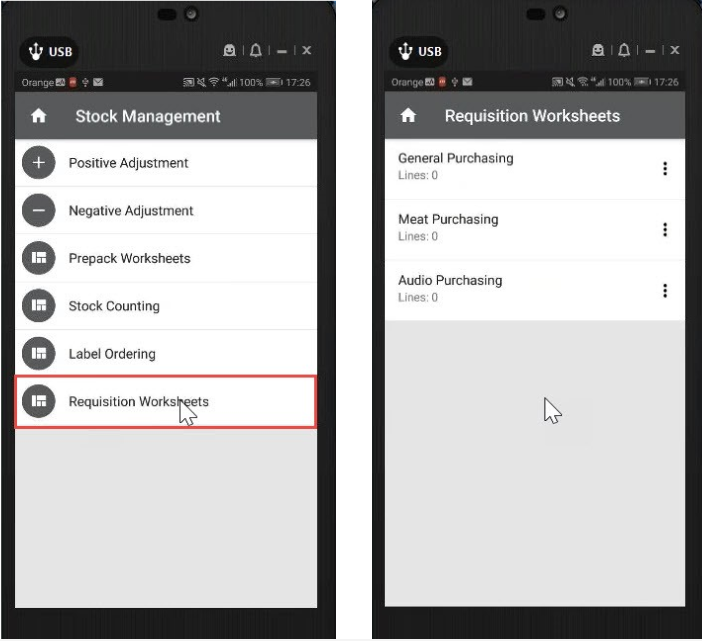
Click on the Requisition Worksheets where you will see the same worksheets created on the Back Office.
-
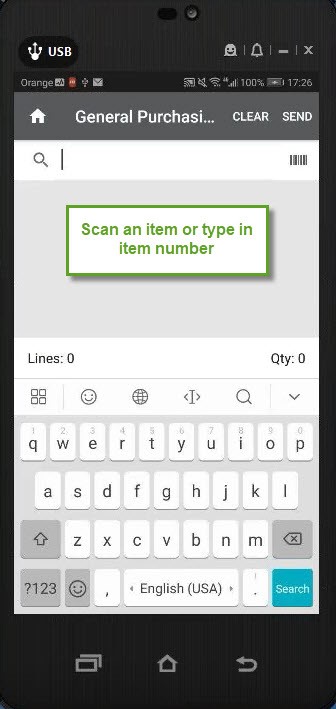
Open one of the Worksheets and scan an item or key in the barcode number.
-
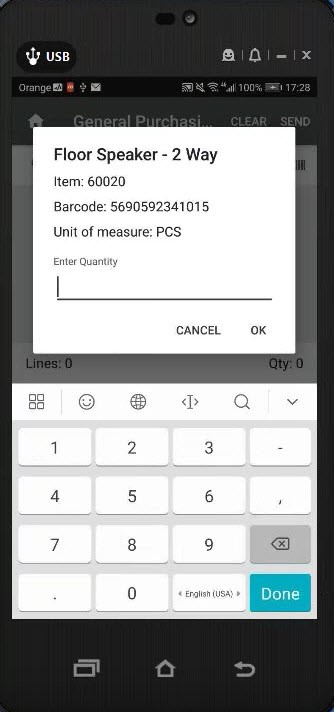
Once the item is scanned, the system finds the item and then asks the user to insert the Qty to purchase. A line is created and all you need is to press Send.
-
This worksheet journal will be sent to the Back Office.
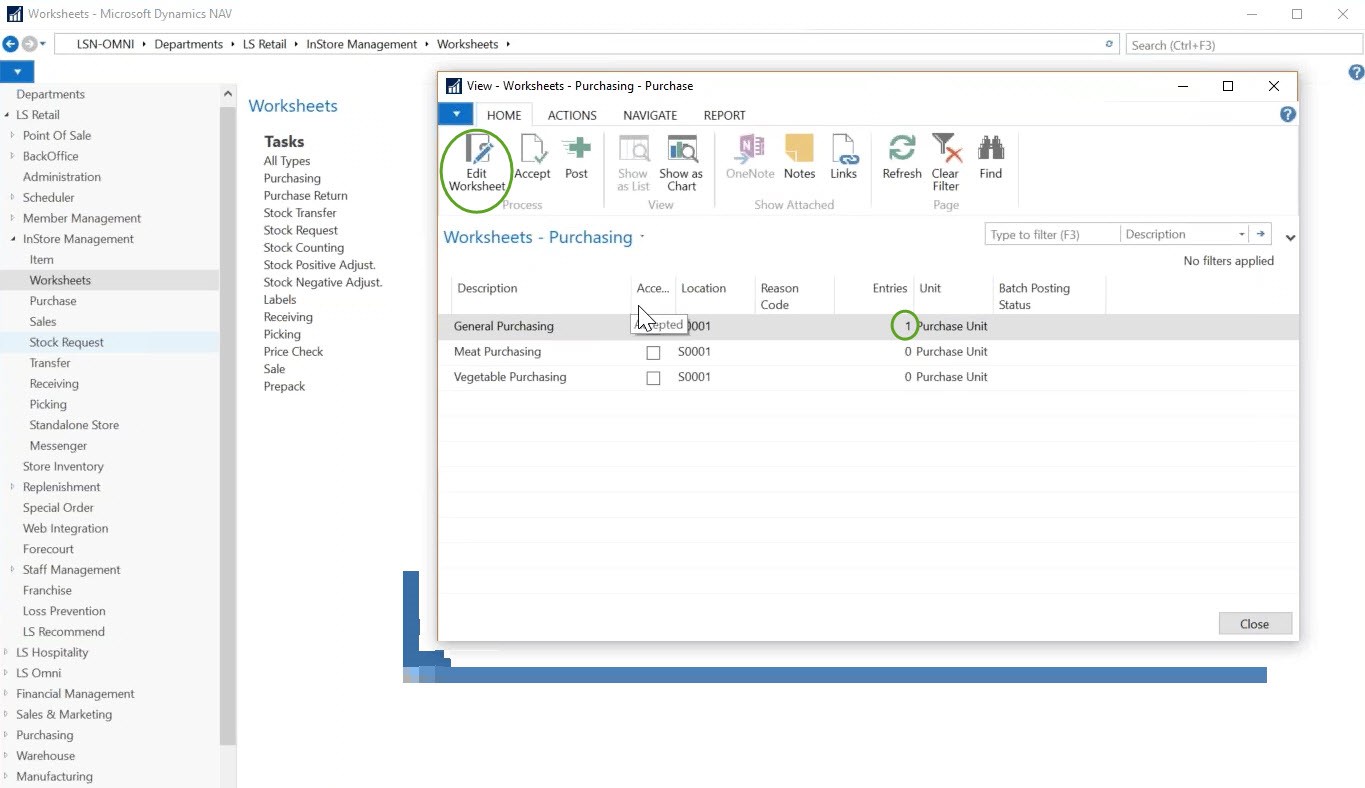
- One final step, before the PO is created, go to the Back Office and open the Worksheets –Purchasing again. You will see now that you have 1 entry. If you open the worksheet by pressing the button “Edit Worksheets”, you will find the request from the store, created with the Inventory app.
-
Once the entry is reviewed, click “Accept” upon which the flag for the “Accepted” field is enabled. And then “Post” it.
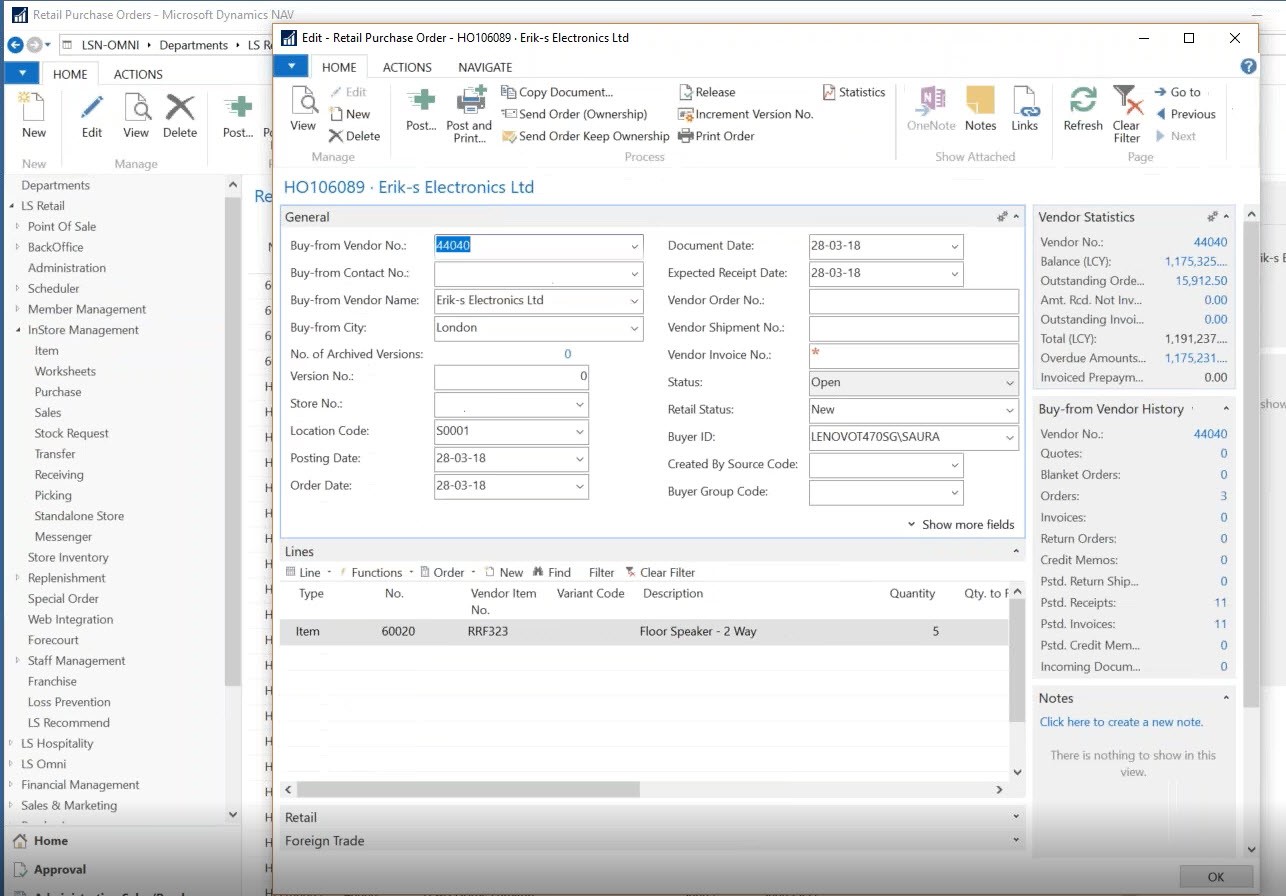
- Once it’s posted, a Retail Purchase Order is created. You can see it by navigating to the Retail Purchase Order section in the Back Office. Fill up the “Vendor Invoice No.” since it is mandatory.
-
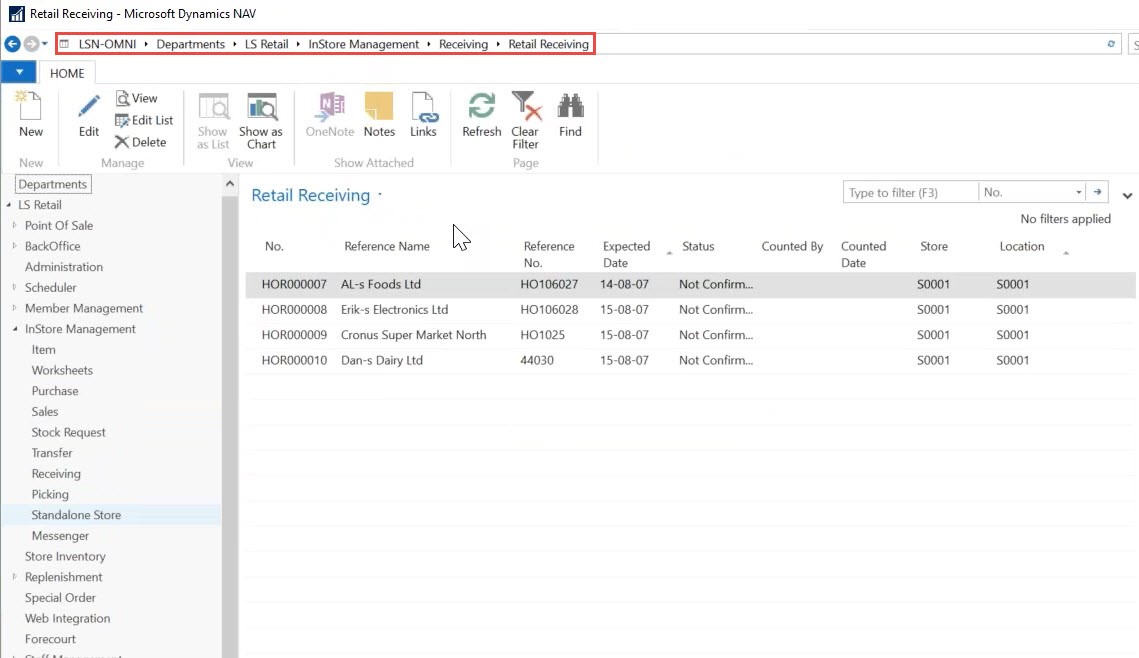
Since the goal is to receive the Purchase Order with the Inventory app in the Store, you will need to create a Retail Receiving Worksheet first.
- Navigate to Retail Receiving and press “New”.
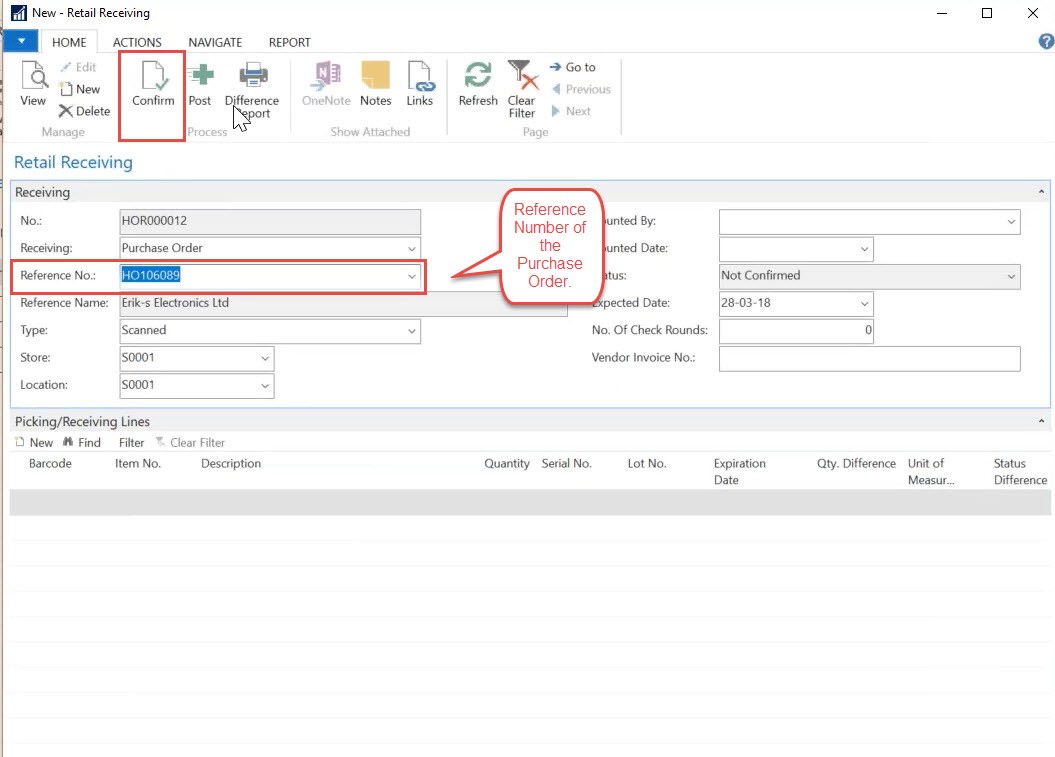
-
Once “Confirm” is pressed the Picking/Receiving Lines tab will be updated.
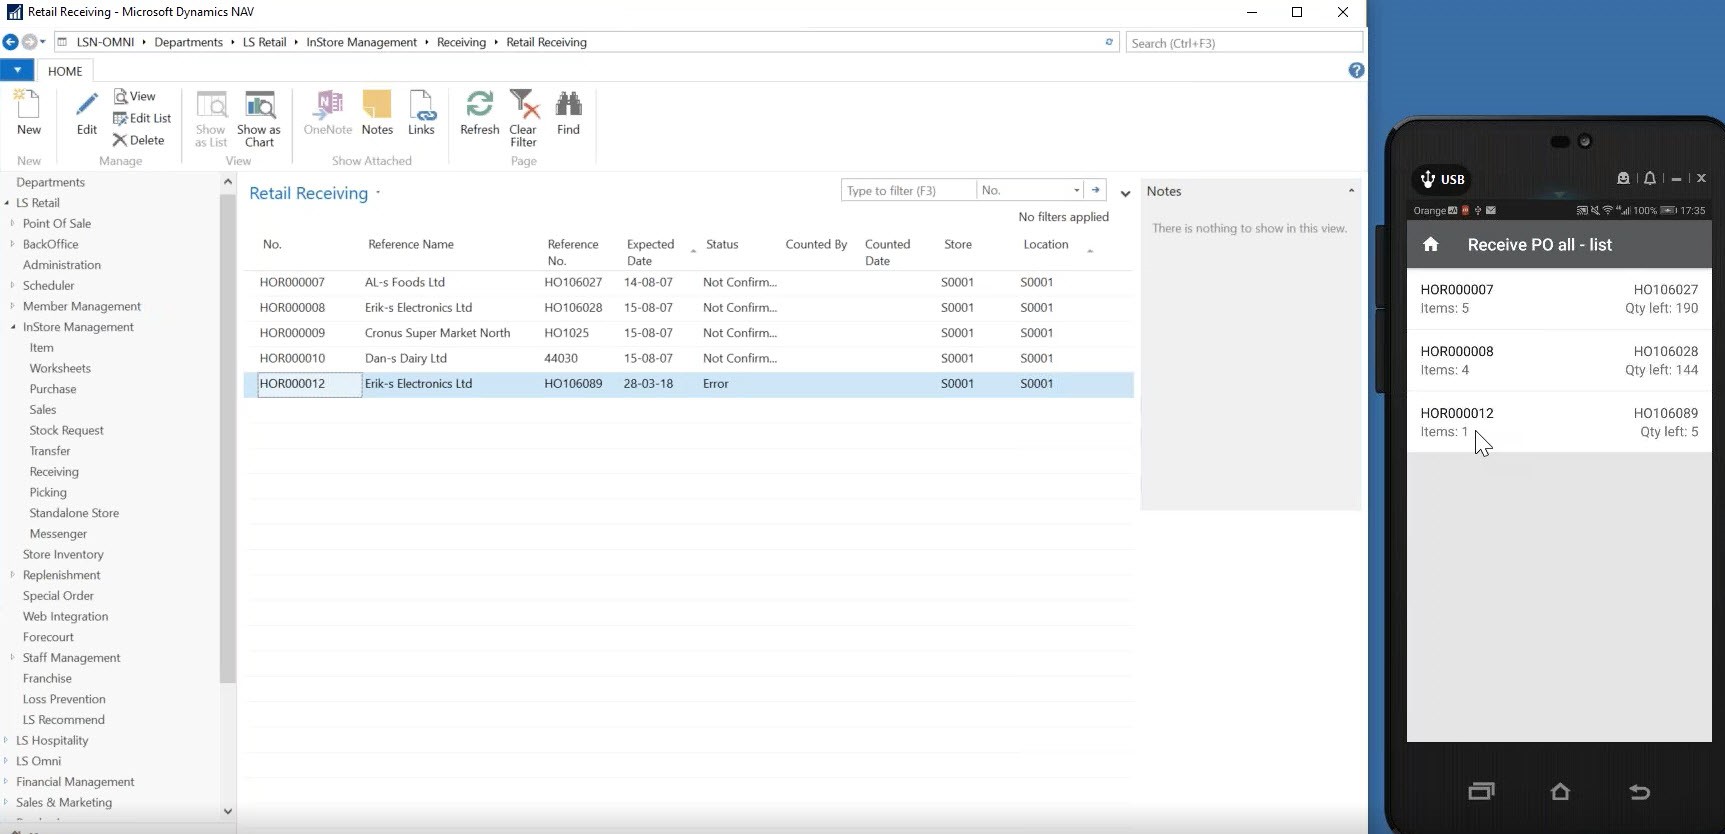
- Close the window (without Confirm it or Post it). Go to the app, and navigate to the Receiving Menu and press Receive PO and open “Receive PO all – list”
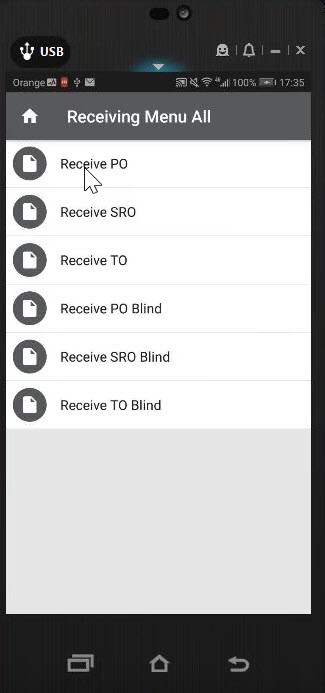
-
It‘s the same Number in the Back Office and in the Inventory app.
- On the App, open the Receiving Order and if the items had been delivered in the store you update the Qty. and then, click on „Send“ to release the Receiving Order from the local data store to LS NAV.
-
In the Back Office, open the Retail receiving Order again, fill up the “Counted Date” field and press “Confirm” and “Post”.
Tech Support from Navisiontech… On-Demand and On Point
Try Navisiontech Support today! We offer 2 FREE hours of support for nearly ALL versions of Dynamics NAV, from version 3 to Business Central. Our support team is US based and will provide support not only for your ERP system, but also for SQL Server, EDI, supply chain management tools, and even code-level support.

Leave A Comment