Today I want to walk through a nice feature of Windows 10, backup and recovery. With our increased reliance on our digital data for everyday life, having a solid plan to keep that data always available will go a very long way to provide you with peace of mind.
Before I get too far into this, I would like to explain a quick tip I use to select the external drive size to backup to for our clients. I always recommend that you double your primary storage drive’s size. So, if you have a 1 TB primary drive, purchase a 2TB drive to backup all of your files. This will allow you to completely back-up your system and all files plus, allow for multiple revisions of everything. This will allow you to be able to go back 30+ days depending on how much and often you are creating, changing and deleting files.
We have several external drive options on our site but the most commonly used and needed is, the
G-Technology 2TB. This drive will cover most basic to advanced users. Let’s get started.
Windows 10 Backup
1. Go to the start button
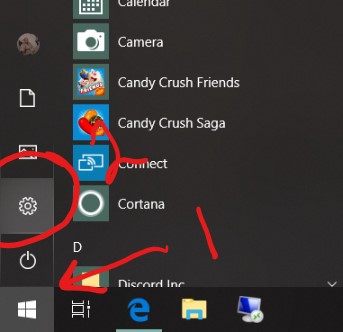
2. Click on the gear icon on the far left
You will now see the “Windows Settings” window.
- Select “Update & Security”
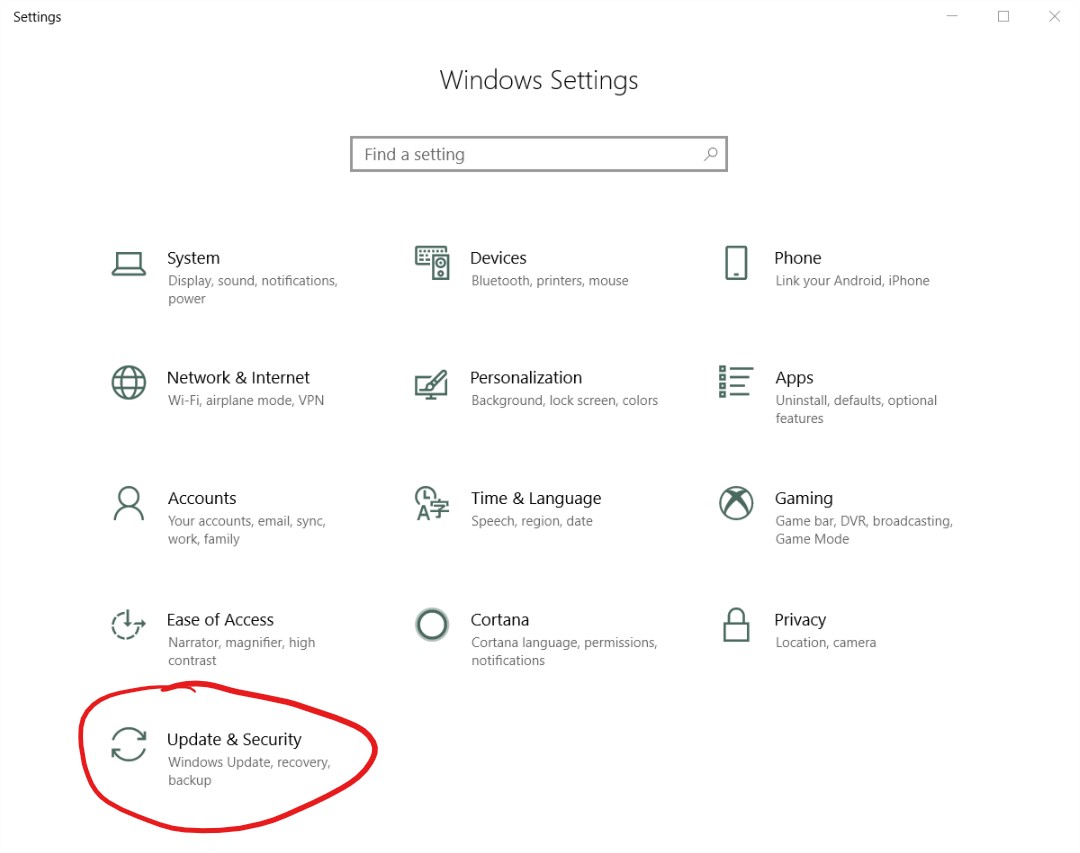
- Select the “Backup” button on the left-hand list.
From here you will need to set up your drive to be the destination for your backups. Make sure your drive is connected otherwise, nothing will show up in your list.
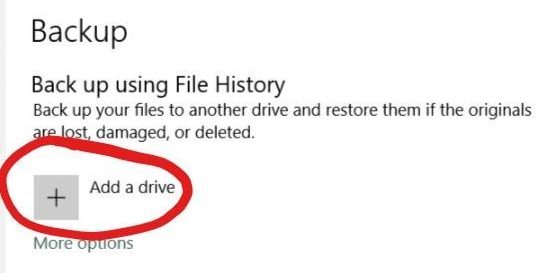
- Click on the plus sign and a drop-down window will expand with your available drives.

- Select your drive, as you can see, mine is easystore (E:).
After you select the drive, the screen will give you an “ON / OFF” toggle button for backups.
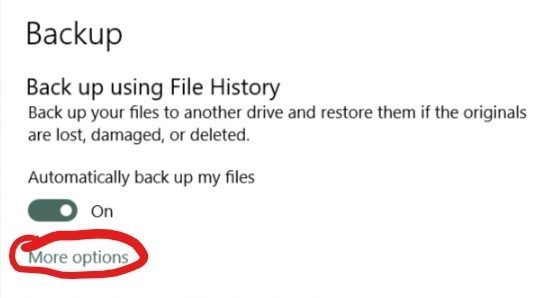
- Click on the “More Options” to view the status and settings of your backups.
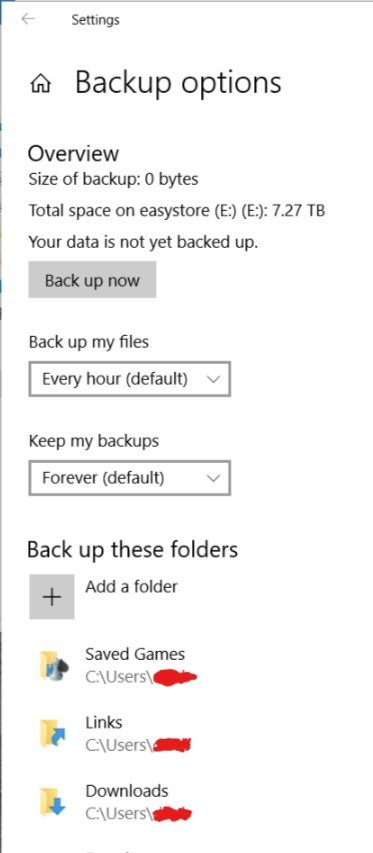
The next screen will show you that the backups have never been run. You can manually trigger a backup by clicking “Back up now” or you can set it to run a backup automatically by selecting an interval under “Back up my files”.
These are the default settings for this configuration.
The default option of Forever under “Keep my backups” will keep as many copies of everything it can. When space runs out, it will delete the oldest data to allow for the new files to be backed up. The first backup can take about 15-30 minutes depending on your drive and amount of data.
You can also specify what folders you want to include in the backup.
Windows 10 Restore Files (Recovery)
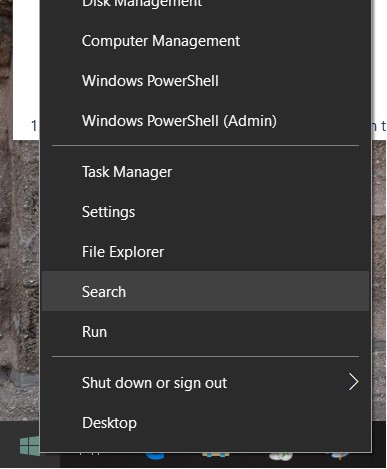
- Right click on the “Start” button and select “Search”.
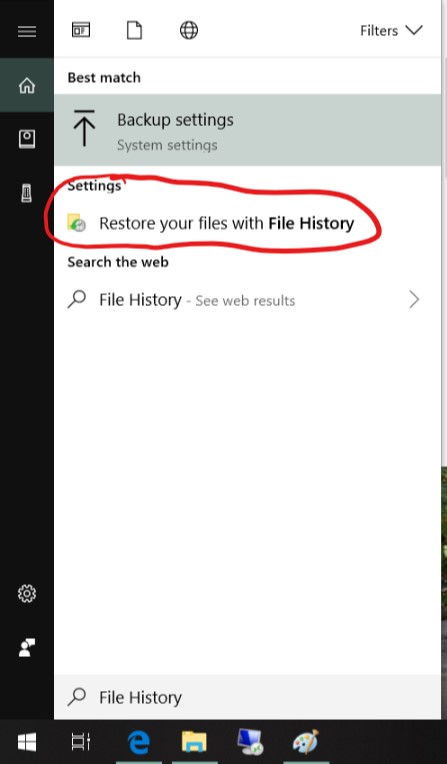
- Type in “File History”
- Select “Restore your files with File History”
The “File History” window will open. This screen will give you access to all of the backups that have taken place for all of the folders you are backing up. You will be able to click into the directories and select the specific file(s) you want to recover. There are a few very important areas on this screen.
- Notice the top right Date/Time and number of backups.
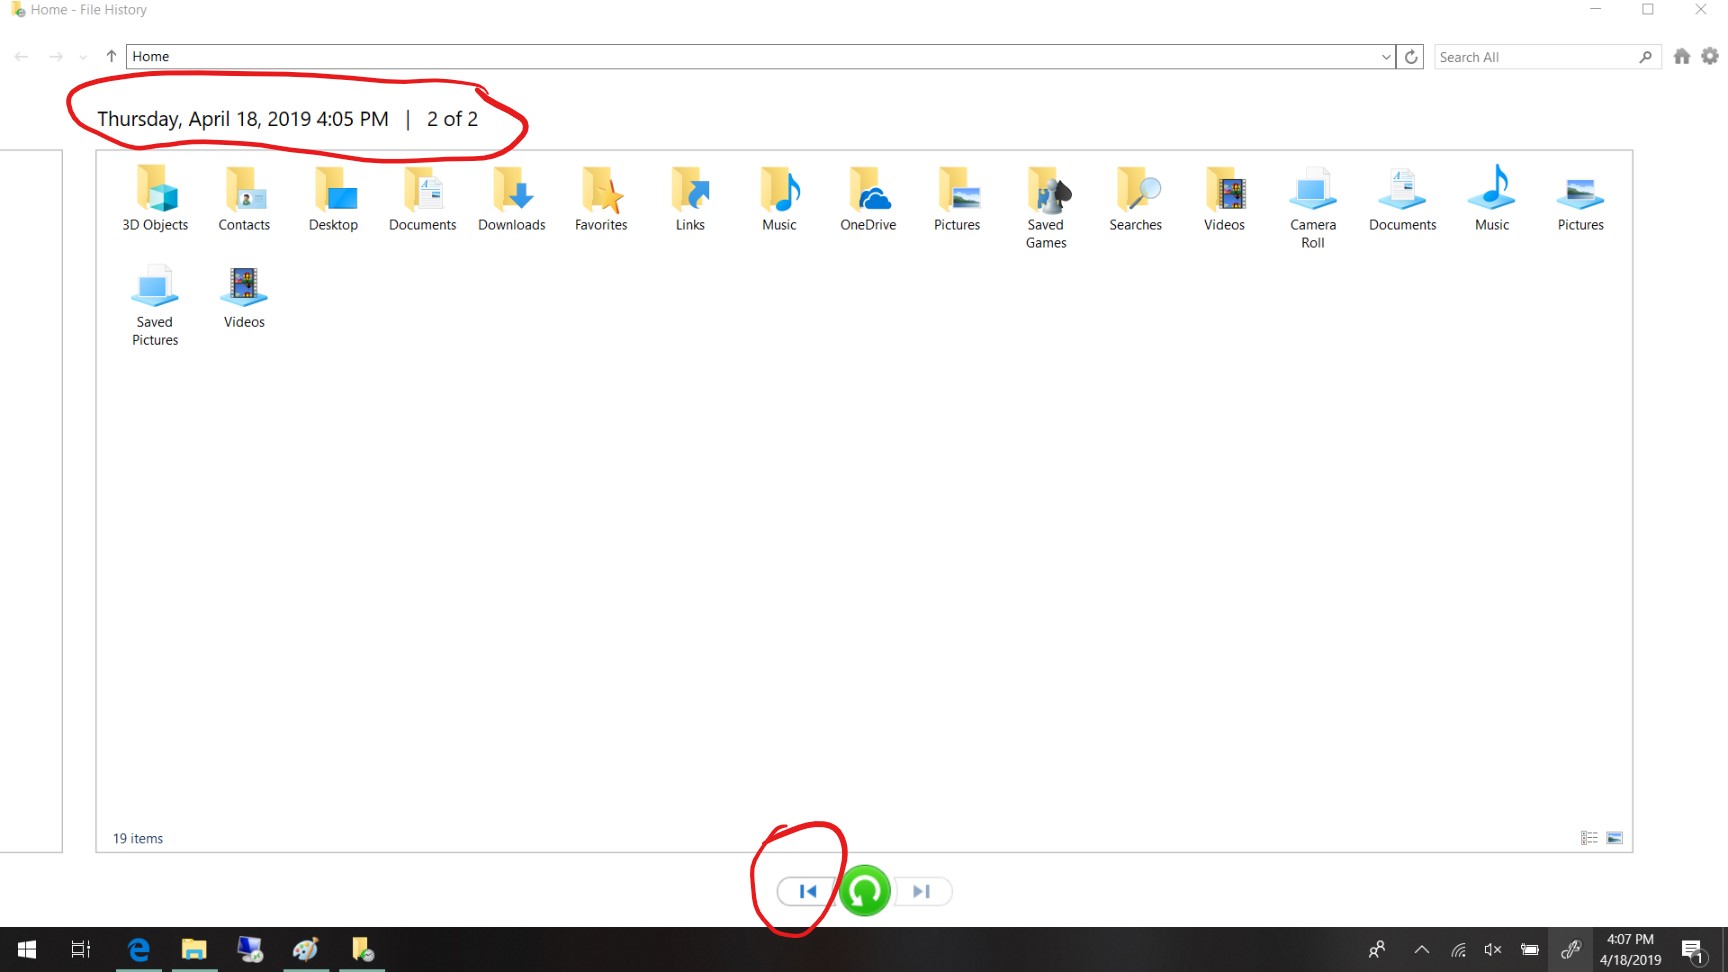
- The second area is the back, recover, and forward buttons at the bottom middle.
- These allow you to navigate through the backup sets. Once you get to the backup set and file(s) you want to recover, click the large green recover button in the middle.
Let’s assume a file on our system has been compromised in some way; unintentional changes are saved on the file, the file is corrupt and unable to be opened, etc. We will use our backup to restore the file.
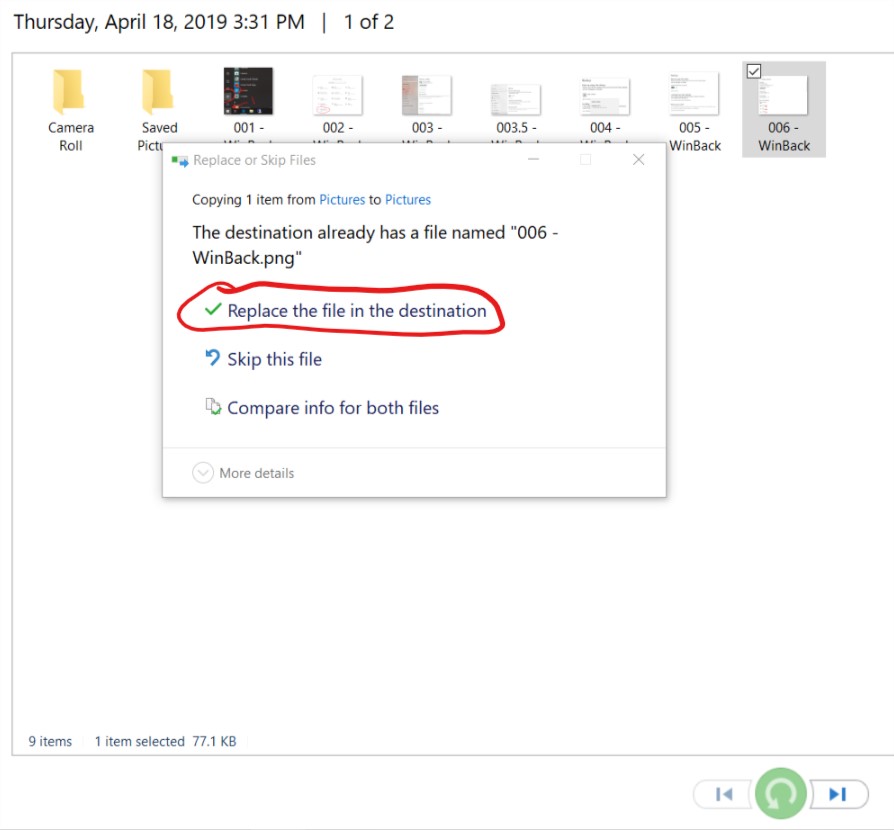
First, we will navigate into the folder in our backup where our file is stored.
For this example, we will navigate to the pictures folder in our backup and select the file 006 – WinBack. We click the large green recover button at the bottom of the page. Since this file already exists on our system, we want to replace it with our recovered file. A message asking what we would like to do will appear. Select “Replace the file in the destination”. The recovery of this file will complete pretty quickly. Now we have the correct file again!
This post covers the basic features of Windows 10 backup and recovery. You are now on your way to making sure your digital data is safe in the event of a system failure. You can also take the external drive with you in the case of natural disasters when you don’t have time to take your entire computer.


Leave A Comment